Posts

Winter time

Image
So after a final blat with the Essex area team last weekend and falling temperatures it's looking like hibernation time till next Spring. It's been a great 4 months since I picked up the car and we've done 2,200 miles ! First up is a proper clean after last weekend's excursion. I used some Turtle Wax Rapid Ceramic Spray as a refresh on all of the paintwork and chrome, as well as on the wheels. Looks great. I also put a light coat of WD40 on as much of the chassis and under-side as I could get at from axle stands. I'm going to start the engine every week or so, and condition the battery every few weeks. I just disconnect the negative cables from the battery at the moment. Having pumped the tyres up to 30psi and filled the tank up with fuel that's basically it. Following advice from other owners I decided to replace some of the rear wing bolts with nylon ones. The forward five bolts go into rivnuts that can easily corrode over time which makes them very difficult ...

Another CL7 Club Essex blat

Image
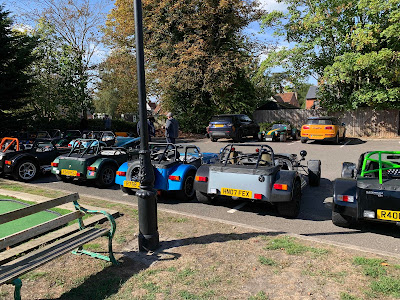
With the excellent weather this weekend the Essex Area group had another blat on Sunday. A bit chilly in the morning but it soon warmed up and by midday it was t-shirt driving weather. 12 of us started out from the usual Great Baddow Barn and headed out to the Abberton Reservoir, a nature reserve just South of Colchester. Our stand-in lead navigator did make a wrong turn half-way along and drove us down a very narrow single-track road that ended up at a deep ford. Basically a river! At this point we all had to reverse our way back up the road 100m, luckily it was quiet there. All adds to the adventure though, it was a good drive there and back to Romford. Let's see how many more dry Sundays we get this autumn.

First service

Image
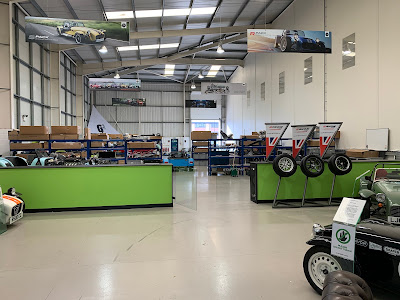
Time for the first service at Caterham Gatwick. This is an initial check over the car at 1,000 miles (or 3 months). I've done 1,500 already in 2 months! There were a couple of items that got fixed. They drained the cooling system to check for an air lock, removed the boot floor to tighten the fuel sender unit, and realigned the headlamps as one came loose. Took about 4 hours but got to chat with James and Alex and the service guys were very good. There's not a lot of cars to view at Gatwick anymore, but I did get to see the new Super Sevens. I still think the 1600 Sigma with the Jenveys is the proper engine..  There were also a couple of new cars awaiting delivery. The Lamborghini Purple looks very nice!  

CL7 Club Essex area blat

Image
This morning I joined the Essex area meet up of the Caterham & Lotus Seven Club. Over 20 cars gathered at the Great Baddow Barn for a blat around the country roads of Essex, ending up at the Swan Inn outside of Colchester (next to the impressive Chappel Viaduct). Excellent weather and a great bunch of people. Mine was the slowest car there of course, but it is just a road car. I can't compete with a CSR260 or 420R ! Shame I had to leave at midday to head off to work, I'll try and stay longer next time.

Recording the sound of the car Part 1

Image
Today I did an initial test of recording the sound (and video) of the car. My focus is on trying to capture reasonably high quality audio, which is quite tricky in a loud open-top car! To record sound I'm using a Zoom H1n audio recorder. This has a stereo microphone setup in an X-Y configuration, which should give some kind of stereo image. Obviously there is a lot of wind noise to deal with, so a wind shield is essential. The device has a limiter, but setting the gain is not straightforward as the loudness levels vary hugely on the road. I set quite a low gain to stay away from the limiter as much as possible.  The recorder was mounted on the passenger side panel, just below the widescreen armrest. For video I just used my iPhone mounted on the passenger headrest column using a bike phone holder. I did some post-processing on the audio, mostly compression and some EQ. As a first go I think it's ok. Will try and improve things next time.

LED front indicators

Image
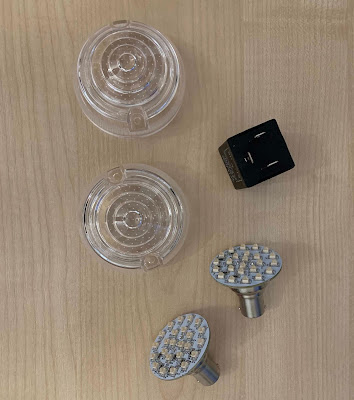
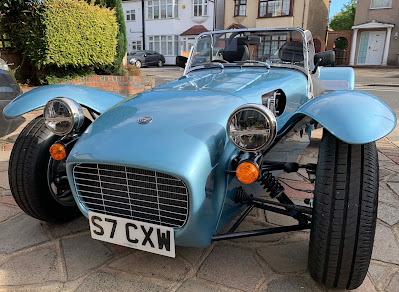
Having previously got the Just Add Lightness front headlights, today I received the front indicators. These are direct replacements for the standard front indicator bulbs, sitting in the same holders. I also ordered clear lenses to replace the current orange ones. Fitting is simply a matter of unscrewing the lens and replacing the old bulb with the new unit. The only other issue is the relay may need replacing due to the low power that the LEDs use. I ordered this as well, and replaced the old relay with the new one on the main fuse board. Identifying the indicator relay is easy as you can hear and feel it working when the indicators are on. Results look great and they are much brighter than the standard units. The only incandescent bulbs remaining are the side indicator repeaters on the front wings. I'm probably going to leave these for now as replacing them means digging out the wiring that is buried in the glue that holds the wing to the stay.

K&N air filter refresh

Image
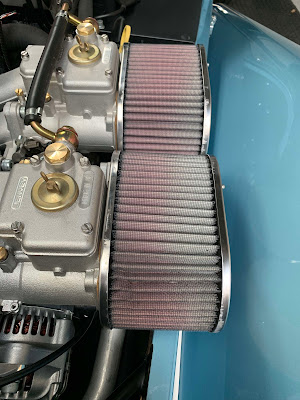
So after my 900 mile trip to Edinburgh and back my K&N air filters are looking a little dry. Halfords do the necessary refresh kit for £12. It comes with a cleaning fluid and an oil spray.  First thing is to remove the air filters by undoing the securing nuts that hold the outer plates in place (8mm spanner). Ooh, naked Jenveys look great ! Having picked off the assorted collection of flies and wasp carcasses I used the oil spray to coat all the way around the filters and let them dry for 20 minutes before refitting. Now they have the proper salmon-red colour. There's lots of oil spray left to do this again. May use the cleaner fluid next time.

Trip to Edinburgh

Image
This was a big one, a 900 mile trip from London to Edinburgh and back. I've been waiting to do this ever since I ordered the car, and this week there was a perfect window of good weather to do it.  Why Edinburgh? Well the reason I sold my previous 7 was to fund a Masters course at Edinburgh University. I then stayed on to do a PhD and postdoctoral work, so I ended up living there for nearly 10 years. I still do work with a colleague at the University so it's partly a business trip, but mostly I just want to do the drive in the car. My plan was to drive up in one day, and then split the return trip with a stop overnight in Manchester to catch up with a friend in Bromley Cross. Having scanned the weather forecasts there seemed to be a nice 4-day block of settled weather from 30th August for the rest of the week, so on Sunday I made the decision to go for it and booked my hotel in Edinburgh. I spent most of the bank holiday Monday preparing for the trip. This was my first major ou...

Early morning test drive

Image
So today I did an early morning drive, leaving at 6am just as it was getting light. The objective (other than to get a drive when the roads are quiet) was to test the hood and the heater. My route was through Brentwood to Chipping Ongar, then across the A414 to the M11 junction. Then back down the M11 and M25 to home. This was the first time I have driven it with the roof on and it works really well. It's not flappy at all, even at 70mph, and nothing mists up like it does with the full hood. Access is easy with the zips. The heater works very well too, giving a nice cabin temperature when I was just wearing a t-shirt. Altogether a very usable setup. I've done 300 miles now. Another 200 and I can finally start to use all of the rev range.  

LED front headlights

Image
Today I received my new LED front headlights from Just Add Lightness. I ordered the headlight upgrade that keeps the outer shell and replaces the inner unit that holds the standard halogen main and sidelight bulbs.  They are the same lights that you can order as a factory option, and are fully certified. Installation was as per this video, apart from there are 2 screws that hold the rim in place and they are located around the bottom. I took the nose cone off to make access easier. It was fairly straightforward, although everything is very tight on my new car. They look great, and I really like the daylight running bar. I have to remember to turn the side light switch off when I get out of the car. Haven't tested them at night yet, but I'm sure they are a massive improvement on the standard candles.

Shower cap and hood bag

Image
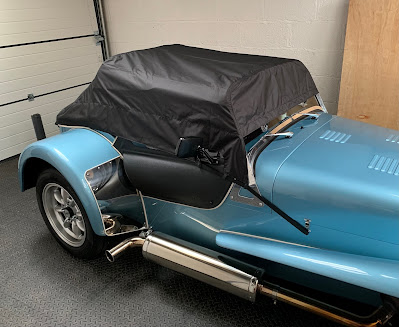
Having got the car back from ceramic coating I finally tested out my Soft Bits shower cap. It fits very nicely around the edges of the boot cover and sidescreens, and is very easy to put on. I'll definitely be using this on my trip to Edinburgh soon. I put some little strips of Helicopter tape on the rear panel to protect the paintwork where the hooks fix under the chassis. Normally the rear elastic is placed under the fog and reverse units, but my car doesn't have them so I spec'd the shower cap with the additional hooks.  I've also purchased a Soft Bits hood bag. The half hood is actually quite difficult to get in, as the zips don't extend the whole length of the bag. However, my main reason for getting it is to help reduce water ingress from the rear.  The hood bag fits nicely into the space between the boot cover and the bottom edge of the half hood. I'm hoping this will change the air flow around the back of the car, and reduce water spray being sucked into...

Ceramic coating

Image
My car went in for ceramic coating yesterday, at TMD detailing in Doddinghurst, Essex. The coating will take a week or so to cure properly, and you can't wash it for 2 weeks. It looks great, very happy with the appearance. The detailer used a 2-year durable coating rather than an extra shiny one. He also coated the chrome work including the silencer.  It costs £400, which I think is fine. It looks immaculate. I can highly recommend Taylor if you're in the Essex area.

Fuse box arrangement

Image
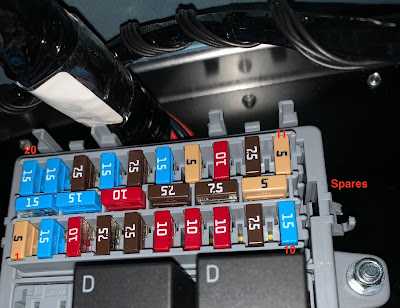
One thing that has puzzled me is the arrangement of the fuses. The online Owner's Manual has a diagram for the layout in the 170 and Duratec cars, but nothing for Sigmas. My fuse box looks like this: After a call with Caterham, we finally identified the fuses. You have to rotate the Figure 24 in the manual (the layout from the 170), and then ignore the centre row which are spares. Then apply the numbering system from the table in the manual titled 275/280. The number 1 fuse is in the bottom left row, running to number 10 in the bottom right. Then 11 is top row right going to 20 at the top left.  That wasn't exactly obvious. The fuses are very tightly located and access is awkward. I managed to remove a fuse using a little plastic fuse extractor tool (available from Halfords). Note that they are Mini blade size fuses, not regular.

Interior spec

Image
So along with the heritage external styling the Super Seven 1600 came with some really nice interior features. Some were standard, such as the Smiths dials and chrome gear knob, and others were optional extras. I tried to keep these to a minimum, but got a couple of items that really suit the car. Firstly, the Moto-Lita steering wheel which I really like. It looks and feels great, and I think it's easier to use than the small Momo ones. The steering feels perfectly weighted and not at all twitchy with this wheel. I also went for the Biscuit Beige leather dash and gaitors which I think work really well. I gives the interior a 2-tone effect with the black leather seats and other panels. The quality of the leather on the seats seems better than the regular ones, and everything smells amazing. One thing I would like to do is swap the vinyl sidescreen armrests for matching beige leather ones. This may happen soon..