Posts

Showing posts from August, 2022

Early morning test drive

Image
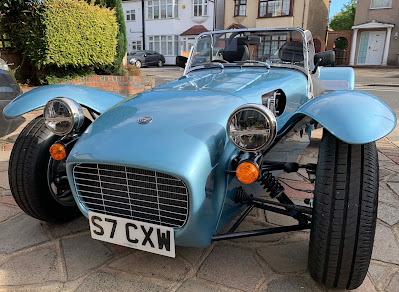
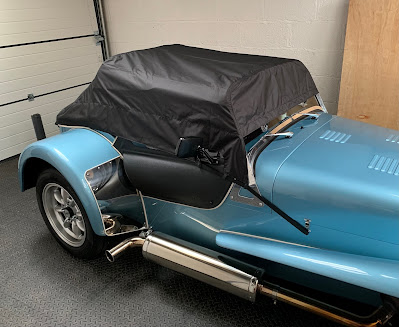
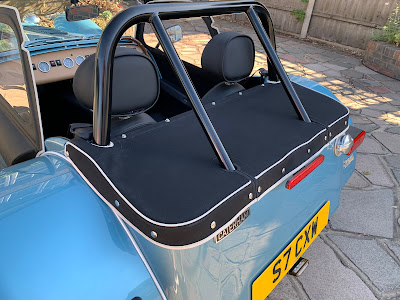
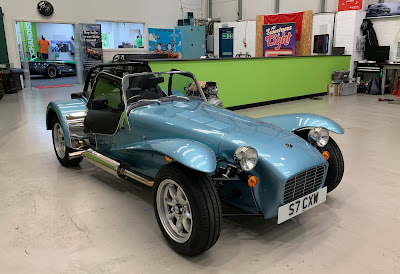
So today I did an early morning drive, leaving at 6am just as it was getting light. The objective (other than to get a drive when the roads are quiet) was to test the hood and the heater. My route was through Brentwood to Chipping Ongar, then across the A414 to the M11 junction. Then back down the M11 and M25 to home. This was the first time I have driven it with the roof on and it works really well. It's not flappy at all, even at 70mph, and nothing mists up like it does with the full hood. Access is easy with the zips. The heater works very well too, giving a nice cabin temperature when I was just wearing a t-shirt. Altogether a very usable setup. I've done 300 miles now. Another 200 and I can finally start to use all of the rev range.  

LED front headlights

Image
Today I received my new LED front headlights from Just Add Lightness. I ordered the headlight upgrade that keeps the outer shell and replaces the inner unit that holds the standard halogen main and sidelight bulbs.  They are the same lights that you can order as a factory option, and are fully certified. Installation was as per this video, apart from there are 2 screws that hold the rim in place and they are located around the bottom. I took the nose cone off to make access easier. It was fairly straightforward, although everything is very tight on my new car. They look great, and I really like the daylight running bar. I have to remember to turn the side light switch off when I get out of the car. Haven't tested them at night yet, but I'm sure they are a massive improvement on the standard candles.

Shower cap and hood bag

Image
Having got the car back from ceramic coating I finally tested out my Soft Bits shower cap. It fits very nicely around the edges of the boot cover and sidescreens, and is very easy to put on. I'll definitely be using this on my trip to Edinburgh soon. I put some little strips of Helicopter tape on the rear panel to protect the paintwork where the hooks fix under the chassis. Normally the rear elastic is placed under the fog and reverse units, but my car doesn't have them so I spec'd the shower cap with the additional hooks.  I've also purchased a Soft Bits hood bag. The half hood is actually quite difficult to get in, as the zips don't extend the whole length of the bag. However, my main reason for getting it is to help reduce water ingress from the rear.  The hood bag fits nicely into the space between the boot cover and the bottom edge of the half hood. I'm hoping this will change the air flow around the back of the car, and reduce water spray being sucked into

Ceramic coating

Image
My car went in for ceramic coating yesterday, at TMD detailing in Doddinghurst, Essex. The coating will take a week or so to cure properly, and you can't wash it for 2 weeks. It looks great, very happy with the appearance. The detailer used a 2-year durable coating rather than an extra shiny one. He also coated the chrome work including the silencer.  It costs £400, which I think is fine. It looks immaculate. I can highly recommend Taylor if you're in the Essex area.

Fuse box arrangement

Image
One thing that has puzzled me is the arrangement of the fuses. The online Owner's Manual has a diagram for the layout in the 170 and Duratec cars, but nothing for Sigmas. My fuse box looks like this: After a call with Caterham, we finally identified the fuses. You have to rotate the Figure 24 in the manual (the layout from the 170), and then ignore the centre row which are spares. Then apply the numbering system from the table in the manual titled 275/280. The number 1 fuse is in the bottom left row, running to number 10 in the bottom right. Then 11 is top row right going to 20 at the top left.  That wasn't exactly obvious. The fuses are very tightly located and access is awkward. I managed to remove a fuse using a little plastic fuse extractor tool (available from Halfords). Note that they are Mini blade size fuses, not regular.

Interior spec

Image
So along with the heritage external styling the Super Seven 1600 came with some really nice interior features. Some were standard, such as the Smiths dials and chrome gear knob, and others were optional extras. I tried to keep these to a minimum, but got a couple of items that really suit the car. Firstly, the Moto-Lita steering wheel which I really like. It looks and feels great, and I think it's easier to use than the small Momo ones. The steering feels perfectly weighted and not at all twitchy with this wheel. I also went for the Biscuit Beige leather dash and gaitors which I think work really well. I gives the interior a 2-tone effect with the black leather seats and other panels. The quality of the leather on the seats seems better than the regular ones, and everything smells amazing. One thing I would like to do is swap the vinyl sidescreen armrests for matching beige leather ones. This may happen soon..

Front number plate

Image
The front number plate on a Caterham is always a problem. They are in a very vulnerable position and get battered by stones and other road debris. Also, you don't want to damage the nose cone if something hits the number plate. With this in mind I fitted the plate with 3 little blocks of Dual Lock, which is a plastic velcro-type fastener. This allows the plate to be removed, and in the event of something hitting the plate it will come loose without damaging the nosecone. I think this is a better solution than a long strip of VHB tape that is normally used. I also cut down the number plate to the minimum legal size (10mm borders around the letters) which looks much better than a standard width plate given that I only have 5 characters. Now it fits nicely within the dimensions of the nose cone itself.

LED rear lights

Image
So my car has come with the new rear LED lights fitted as standard. I really like them! I don't think they look out of character on the car, and it also means I don't have the terrible old fog and reverse lights which I always hated. I ordered the car without the spare wheel carrier so I now have a really clean rear panel with the classic filler cap and a high level brake light just under the boot cover. I think this is a great setup. Next thing is to upgrade the front lights to LED. I'll be going for JAL units of course.

Fitting the half hood and boot cover

Image
As detailed before, I spec'd my car without a full hood. Instead I purchased a mohair half hood with Easy-In zips direct from Oxted Trimming. I also got a matching boot cover. My car has come with very nice sidescreens that have white piping around the edges, so all that's needed is to fit the hood and replace the vinyl boot cover with my new mohair one.  Fitting the half hood is straight forward. Simply attach the side straps under the roll bar side bolts, and then feed the other straps between the roll bar and rear panel. The boot cover is a bit more tricky.  The cover has holes pre-drilled in the metal leading edge bar, so the first job is to locate them and make holes through the mohair. I just used a self-taping screw for this. With the old boot cover removed, I put the new cover in position and secured it lightly with 4 screws through the metal edge bar. Then it's a matter of using a white chinagraph pen to mark up the popper positions. As I don't have the expensi

Handover from Gatwick !

Image
And finally, after an excruciating 10 week delay, I've picked-up the car from Caterham Gatwick. It looks fab ! I love the colour and interior details. They put old-English piping around the sidescreens which looks great. I have the LED rear lights and a high level brake light too. The 12V socket plate fell off during the drive home, but otherwise all good. It sounds amazing, even though I'm trying to keep it under 4000 revs. More posts to come soon !